[Part 1] Deploy a Microsoft Copilot AI Agent to SharePoint with SSO enabled.

If you’re like me, you must have been frustrated with the fact that you have to log in every time you need to chat or send a message to a copilot agent on a SharePoint site. Since the copilot is embedded within the site and does not utilize Single Sign-On (SSO), it disrupts the user experience and creates unnecessary authentication hurdles. Fortunately, by integrating Microsoft Copilot Studio copilots into SharePoint with SSO, we can streamline authentication, allowing users to access AI-driven assistance seamlessly without repeated logins. In this guide, I’ll walk you through the step-by-step process of deploying a Microsoft Copilot Studio copilot as a SharePoint component with SSO integration.
Copilot Studio supports single sign-on (SSO). SSO allows agents on your SharePoint intranet to sign customers in if they’re already signed in to the page where the agent is deployed.
Prerequisites
Before starting the deployment, ensure you have the following:
- Microsoft Entra ID (formerly Azure AD): Administrative access to configure authentication.
- SharePoint Online: Access to the SharePoint site where the copilot will be deployed.
- Copilot Studio Environment: A configured copilot that you want to integrate.
- Development Tools: Installed tools like Visual Studio Code, Node.js, and PowerShell.
Configure Microsoft Entra ID authentication for your copilot
Prerequisites:
You complete the first several steps in the Azure portal, and complete the final two steps in Copilot Studio.
- Sign in to the Azure portal, using an admin account in the same tenant as your agent.
- Go to App registrations.

3. Select New Registration and enter a name for the registration. Don’t alter existing app registrations.
4. Under Supported account types, select Accounts in any organizational directory (Any Microsoft Entra ID tenant — Multitenant) and personal Microsoft accounts (e.g. Skype, Xbox)
The Redirect URI should be the same as the URL for your SharePoint site that will host the copilot. For example, if you plan to deploy the copilot on https://mytenant.sharepoint.com/sites/MySite, set this as your redirect URI.

Important: Users can reach your SharePoint site via addresses that include trailing slashes. Since redirect URIs are sensitive to this variation, consider creating two redirect URIs representing the same site, with and without a trailing slash (for example: https://mytenant.sharepoint.com/sites/MySite and https://mytenant.sharepoint.com/sites/MySite/)
6. Select Register.

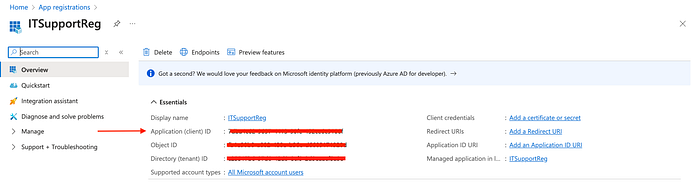
7. After the registration is complete, you should be automatically redirected to the Overview page, otherwise click on Overview.
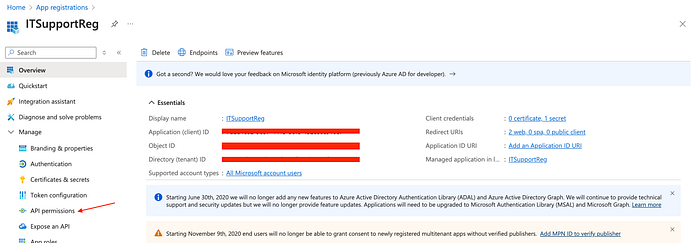
8. Copy the Application (client) ID and paste it in a temporary file. You need it in later steps.
Add the redirect URL
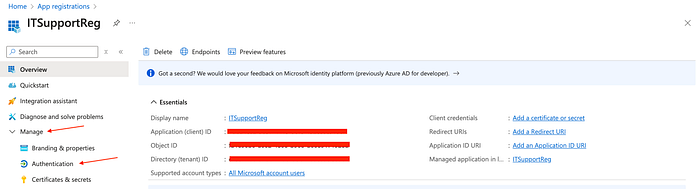
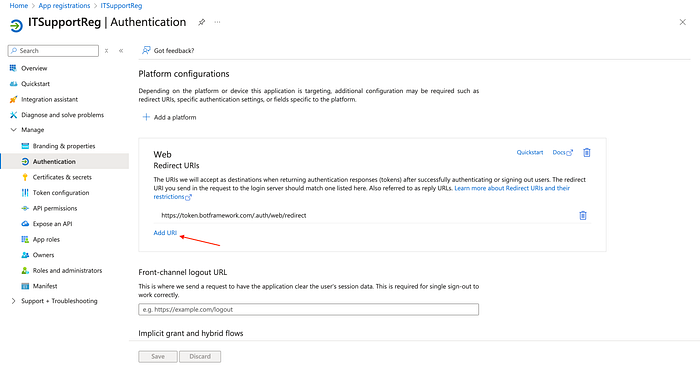
9. Under Manage, select Authentication.
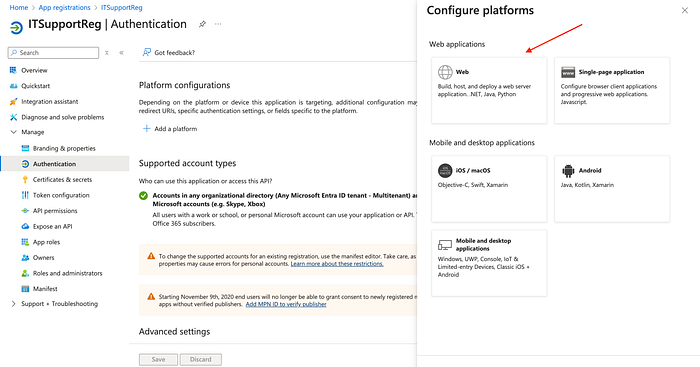
10. Under Platform Configurations, select Add a platform, and then select Web.
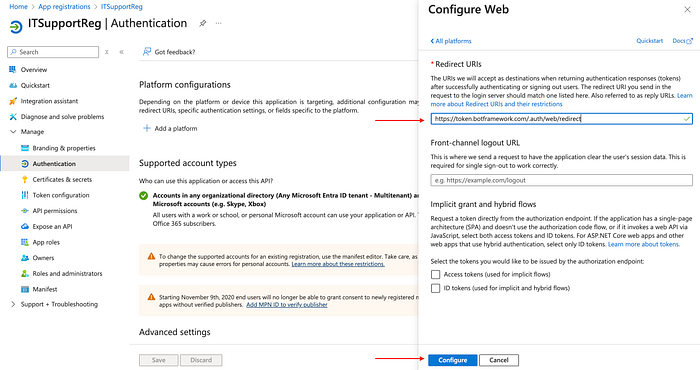
11. Under Redirect URIs, enter https://token.botframework.com/.auth/web/redirect, and select Configure.
This action takes you back to the Platform configurations page.
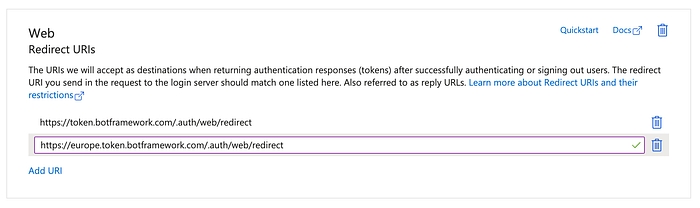
12. Under Redirect URIs for the Web platform, select Add URI.
13. Enter https://europe.token.botframework.com/.auth/web/redirect, and select Save.
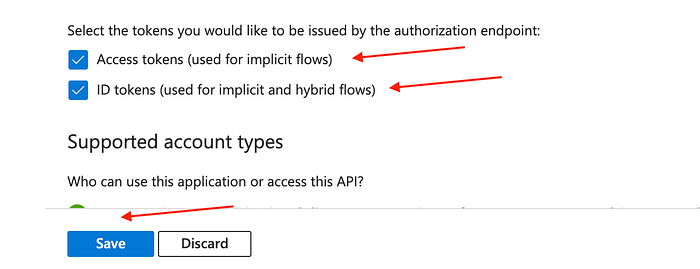
14. In the Implicit grant and hybrid flows section, select both Access tokens (used for implicit flows) and ID tokens (used for implicit and hybrid flows).
Generate a client secret
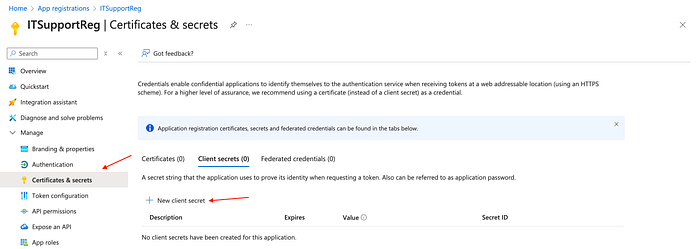
15. Under Manage, select Certificates & secrets.
16. In the Client secrets section, select New client secret.
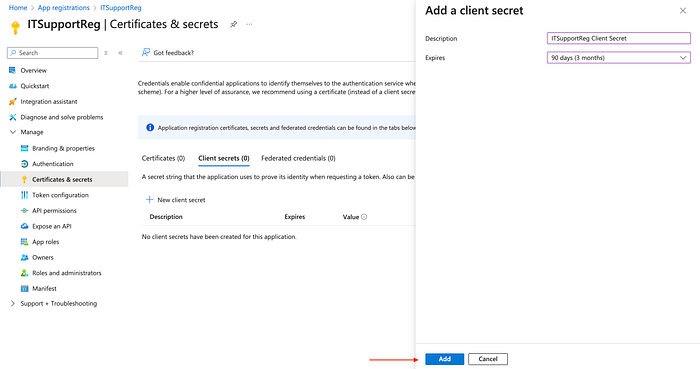
17. (Optional) Enter a description. One is provided if left blank.
18. Select the expiry period. Select the shortest period that’s relevant for the life of your agent.
19. Select Add to create the secret.
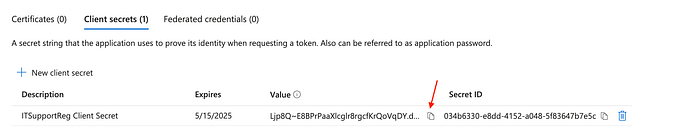
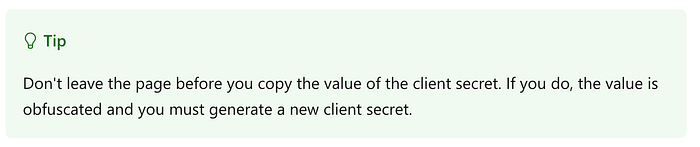
20. Copy the secret’s Value to a text editor or a safe location. You need it when you configure your agent’s authentication later on.
Configure manual authentication (Copilot Studio)
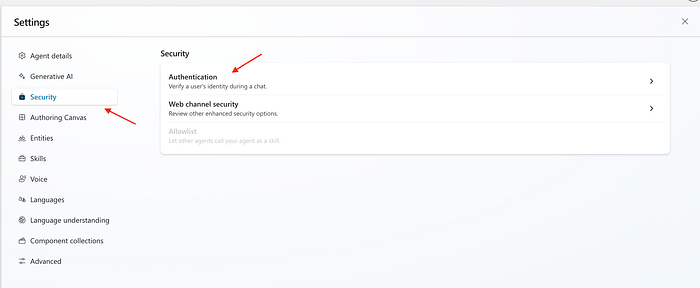
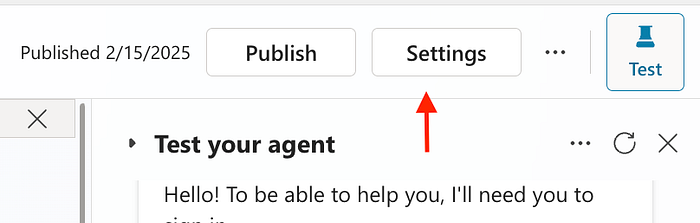
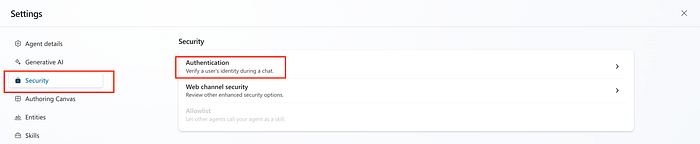
21. In Copilot Studio, go to Settings for your agent, and select Security.
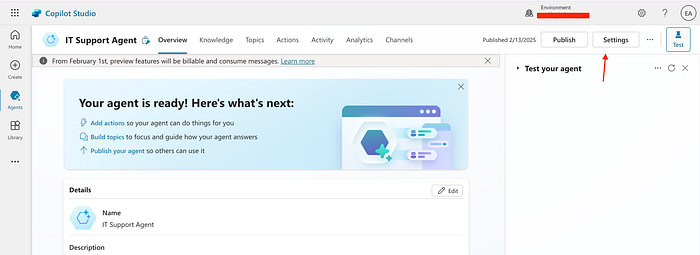
22. Select Security
23. Select Authentication.
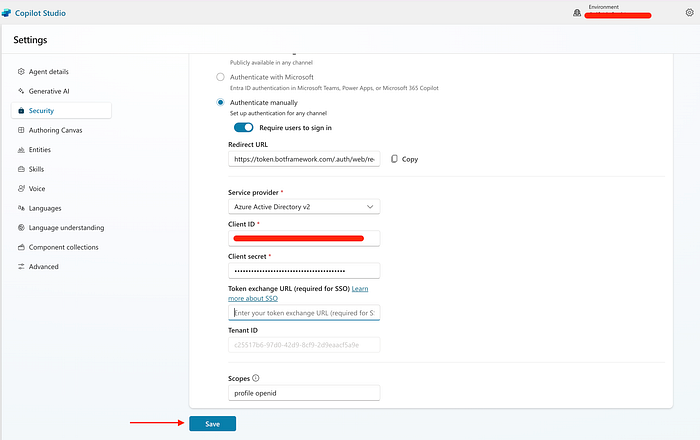
23. Select Authenticate manually.
24. Leave Require users to sign in as on.
25. Enter the following values for the properties:
- Service provider: Select Azure Active Directory v2.
- Client ID: Enter the application (client) ID that you copied earlier from the Azure portal.
- Client secret: Enter the client secret you generated earlier from the Azure portal.
- Scopes: Enter
profile openid.
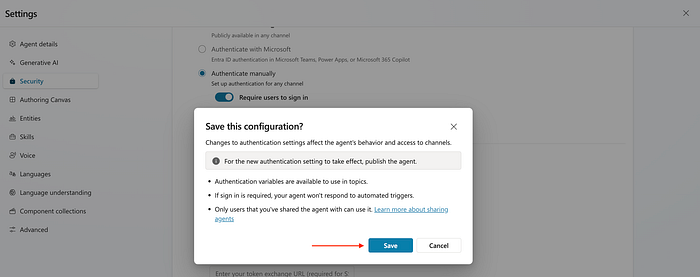
26. Select Save to finish the configuration.
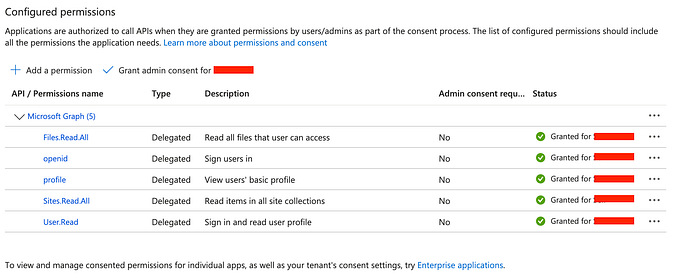
Configure API permissions (Azure)
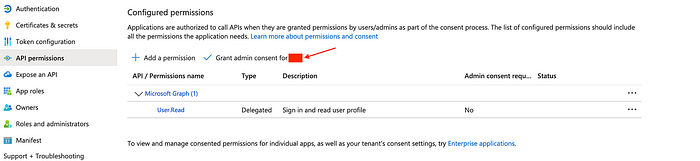
27. Go to API permissions under Manage.
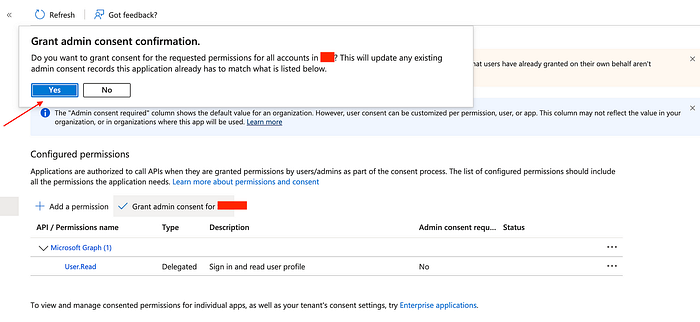
28. Select Grant admin consent for <your tenant name>, and then select Yes. If the button isn’t available, you might need to ask a tenant administrator to do this step.

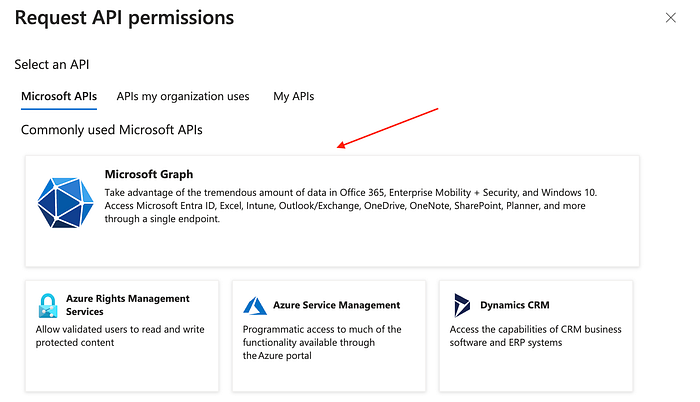
29. Select Add a permission, and then select Microsoft Graph.

30. Select Delegated permissions.
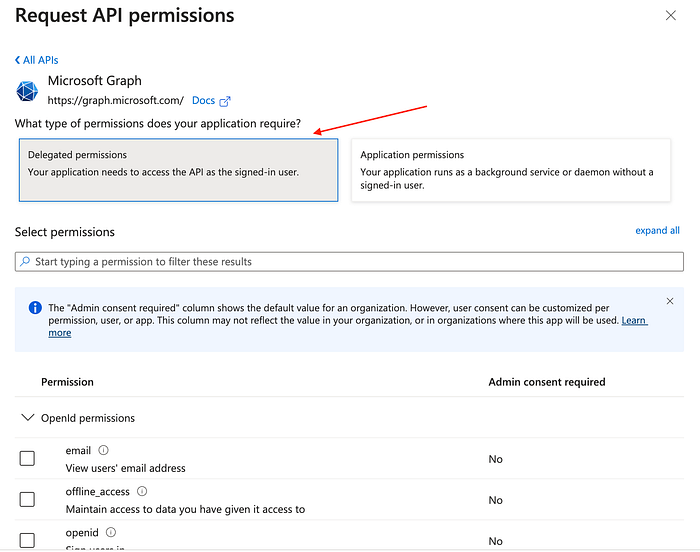
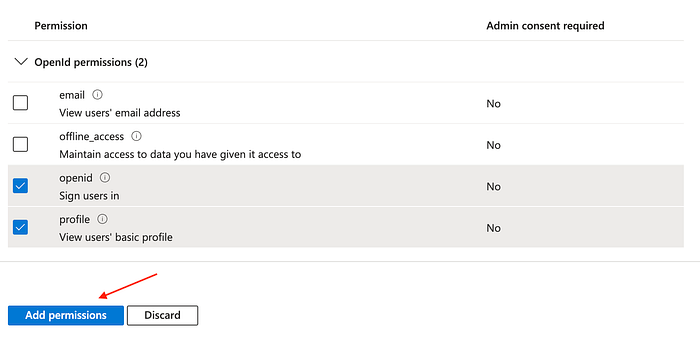
30. Expand OpenId permissions and turn on openid and profile.
31. Select Add permissions.
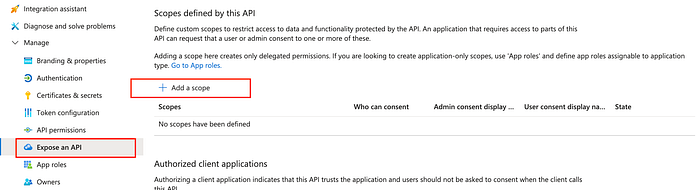
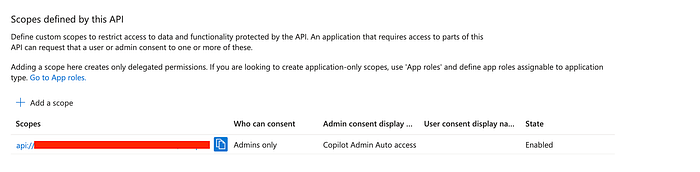
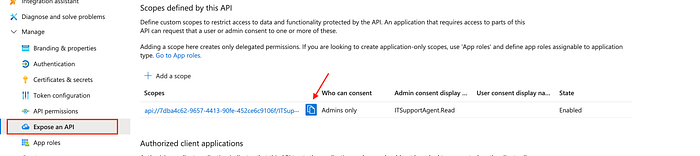
Define a custom scope for your agent (Azure)
Scopes allow you to determine user and admin roles and access rights. You create a custom scope for the canvas app registration that you create in a later step.
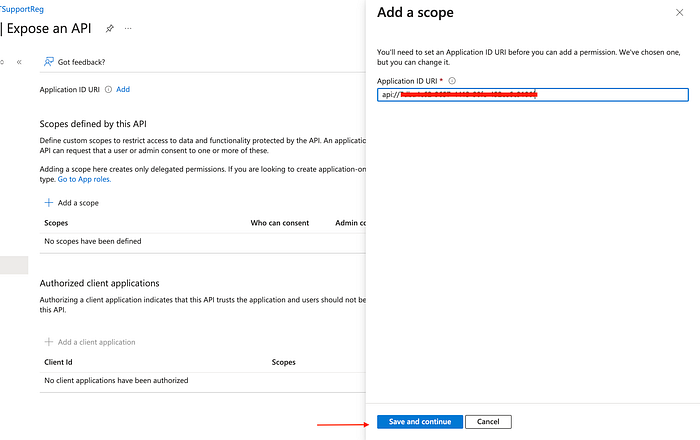
31. Go to Expose an API and select Add a scope.
32. The Application ID URI field will be field automatically
33. Click Save and continue.
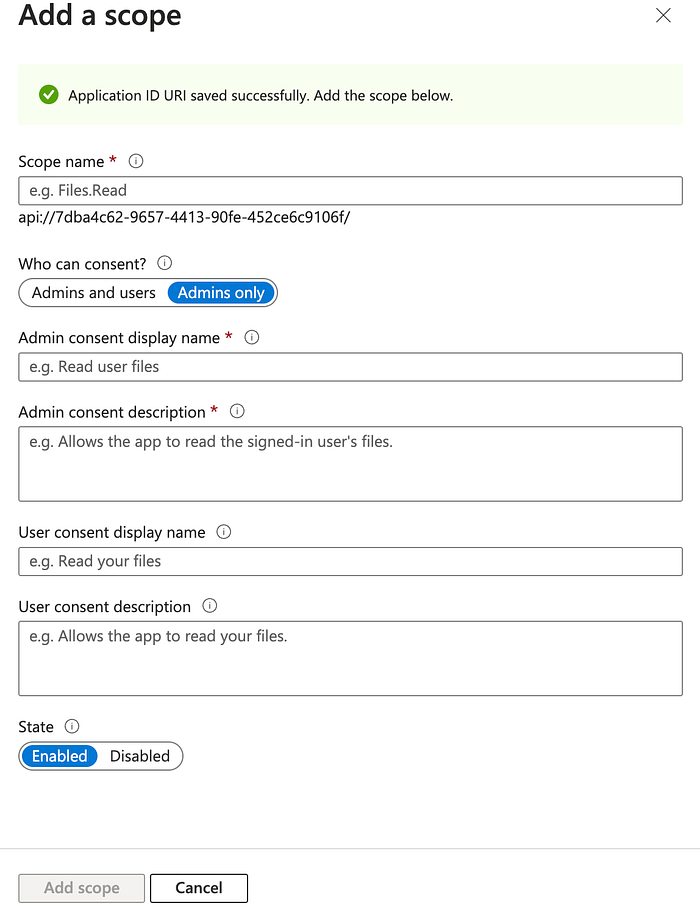
Set the following properties. You can leave the other properties blank.
Scope name: Enter a name that makes sense in your environment, such as
Test.ReadWho can consent?: Select Admins and usersAdmin consent display name: Enter a name that makes sense in your environment, such as
Test.ReadAdmin consent description: Enter
Allows the app to sign the user in.State: Select Enabled.
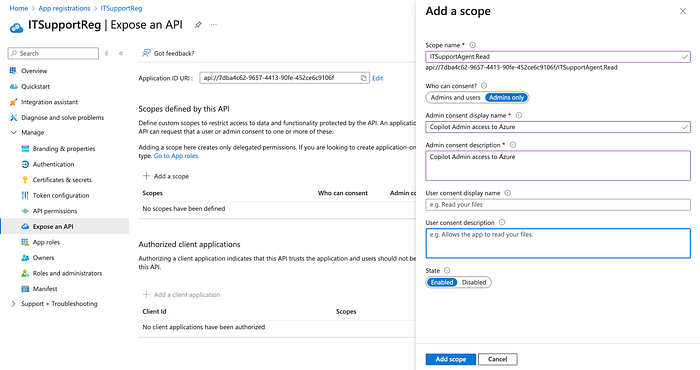
34. Select Add scope.
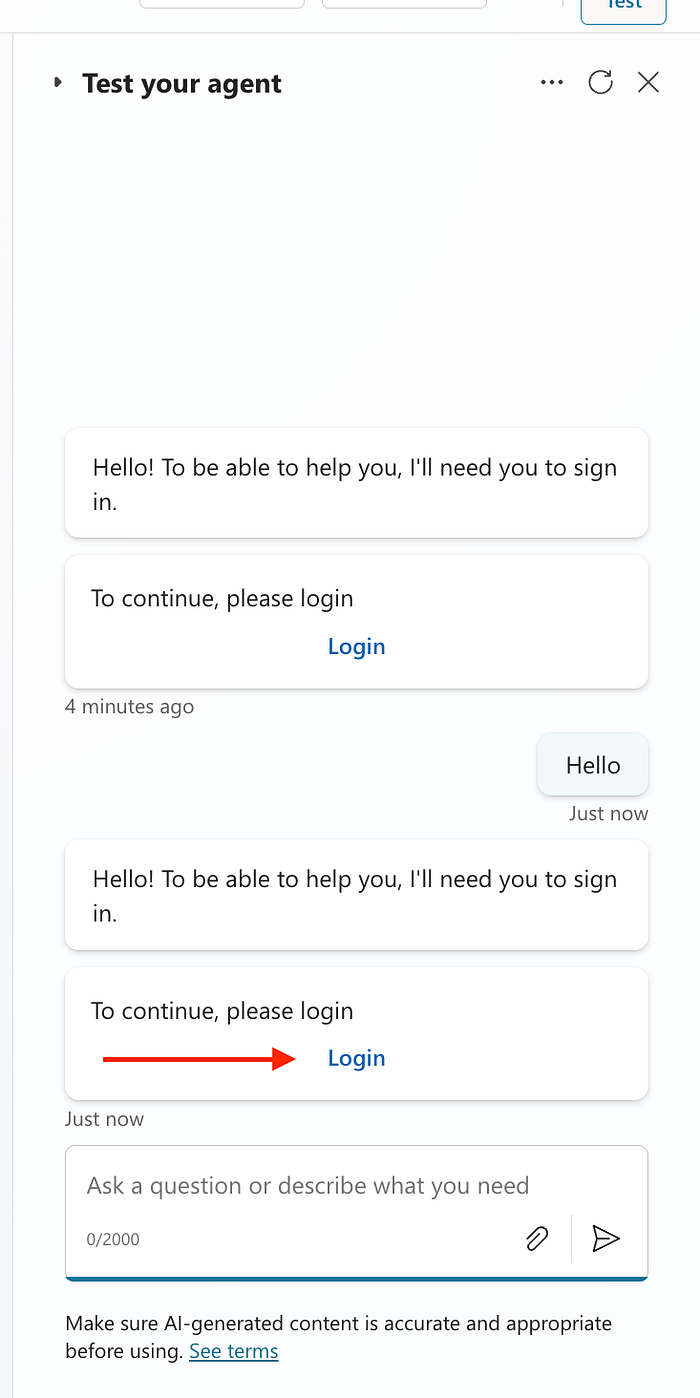
Test your agent
- Publish your agent.
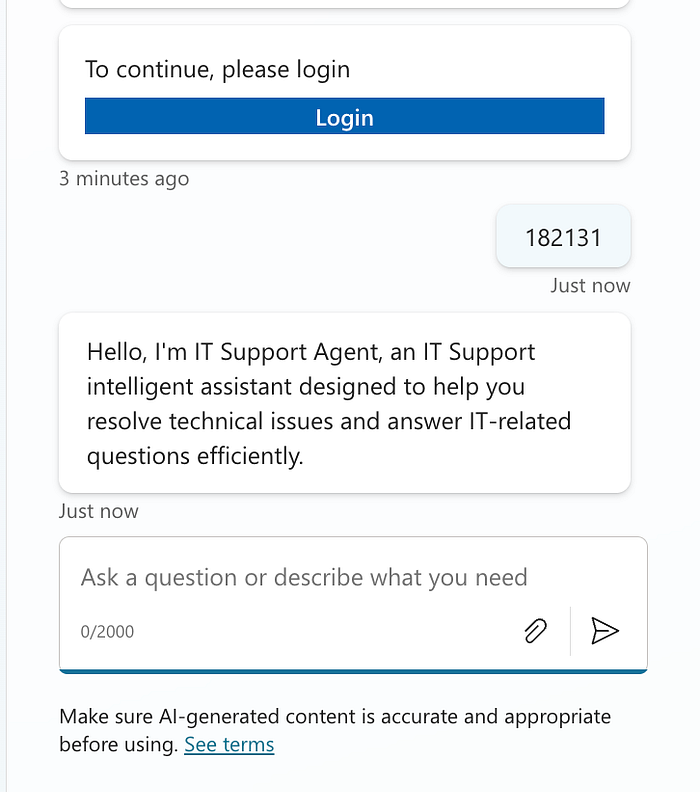
- In the Test agent pane, send a message to your agent.
- When the agent responds, select Login.
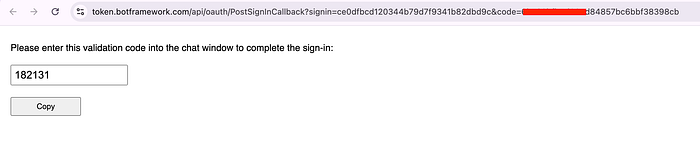
A new browser tab opens, asking you to sign in.
4. Sign in, and then copy the displayed validation code.
5. Paste the code in the agent chat to complete the sign-in process.
Add scopes for SharePoint and OneDrive (Azure)
To enable your copilot to utilize the Generative Answers feature with a SharePoint or OneDrive data source, you must configure additional scopes for the API permissions assigned to your app.
Add the following API Permissions of the copilot app registration, and ensure to click Grant admin consent for <Tenantname>
- Populate the token exchange URL in the copilot’s authentication settings.
Your copilot will send this URL to any custom application hosting it, instructing the custom application it should sign users in by acquiring a token matching this custom scope. The value for “token exchange URL” is the full URI for the custom scope you have added when configuring a custom API. Click on the copy icon
2. Click Settings on Copilot
3. Click Security > Authentication
4. Paste the custom scope value copied from step 1 above, (api//xxxxxxxxxx) in the Token exchange URL (required for SSO) field.
5. Click Save.
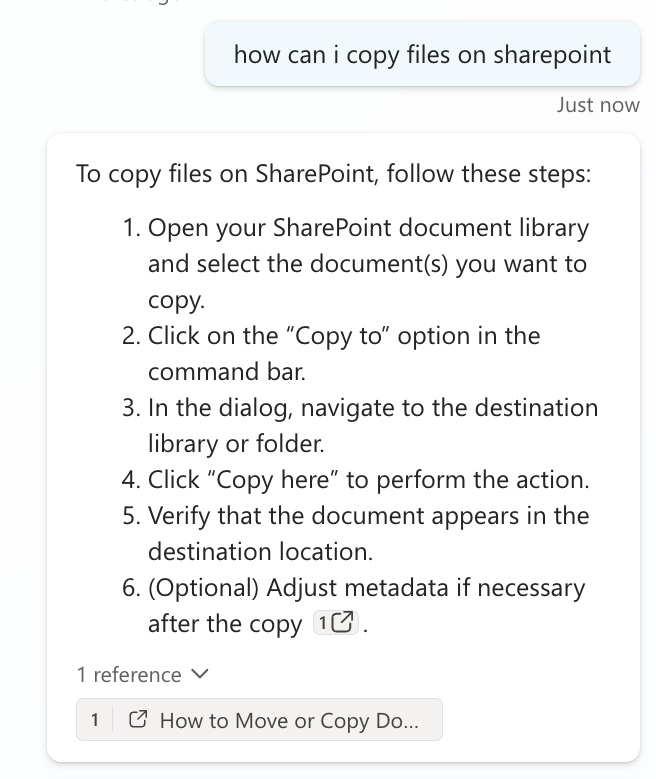
Make sure the Copilot Studio authoring canvas can successfully sign you in. If “Require users to sign in” is selected in the authentication settings, the canvas will try to sign in you in as soon as the conversation starts. Otherwise, the-sign in topic will have to be triggered by a specific event in the conversation. In case Generative Answers is configured over SharePoint or OneDrive, please make sure your copilot responds to questions as expected.
Important: For now, the copilot canvas will use a validation code to sign you in, but once the setup is complete, users will be signed-in seamlessly.
This configuration is a lengthy one, I have decided to break this article into parts, so if you have gotten this far, click on the (Part 2) link below to continue
Disclaimer: Some definitions/info screenshots were gotten directly from Microsoft’s Open Source Github Copilot Samples repository