[Part 2] Deploy a Microsoft Copilot AI Agent to SharePoint with SSO enabled.

If you find yourself here, please ensure that you have completed the steps on the part 1 of this article.
Register your SharePoint site as a custom canvas
A custom canvas is a custom application that hosts your copilot. In this case, it is also the application that will be responsible for a seamless sign-in experience.
To enable SSO, you need to create two separate app registrations:
- An authentication app registration, which enables Microsoft Entra ID user authentication for your agent — This was done in part 1 of this article.
- A canvas app registration, which enables SSO for your custom web page
Microsoft doesn’t recommend reusing the same app registration for both your agent and your custom website for security reasons.
So we’ll configure app registration for our canvas app registration
Configure your canvas app registration
(more screenshots can be found in part 1)
- Sign in to the Azure portal, using an admin account in the same tenant as your agent.
- Go to App registrations.

3. Select New Registration and enter a name for the registration. Don’t alter existing app registrations.
4. Under Supported account types, select Accounts in any organizational directory (Any Microsoft Entra ID tenant — Multitenant) and personal Microsoft accounts (e.g. Skype, Xbox)
5. Under Platform, select Single-page application (SPA) then under Redirect URI, paste the URL for your SharePoint site that will host the copilot. For example, if you plan to deploy the copilot on https://mytenant.sharepoint.com/sites/MySite.

6. Select Register.
7. Click Authentication, and add the same SharePoint URL, but this time with a leading slash. https://mytenant.sharepoint.com/sites/MySite/
Important: Users can reach your SharePoint site via addresses that include trailing slashes. Since redirect URIs are sensitive to this variation, consider creating two redirect URIs representing the same site, with and without a trailing slash (for example: https://mytenant.sharepoint.com/sites/MySite and https://mytenant.sharepoint.com/sites/MySite/)

8. Click Save.
9. Under Manage, click API permissions.
10. Click Add a permission.
The canvas app registration will need permissions for the custom API that was configured in the part 1 of this article. To add this permission, select an API from “APIs my organization uses” and search for the name you have given your copilot app registration, then Select it.
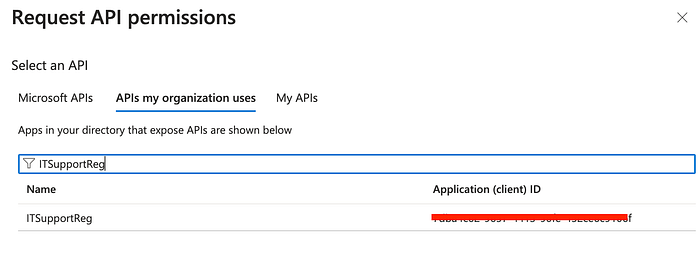
11. Click Add permissions.

Copy the Application (client) ID to a text editor or a safe location.
Now let’s configure the SPFX wrapper for the Copilot Agent.
Download and configure the SharePoint SPFx component
For this section, I will utilize Micrcosoft’s Open Source SPFX application customizer sample — CopilotStudioSamples (github.com). Feel free to build yours or use/extend the same.
Prerequisites:
- VS Code (or a similar code editor)
- A version of Node.JS which is supported by the SPFx framework (for this sample, use either v16 or v18)
- Knowledge of SPFX + Javascript
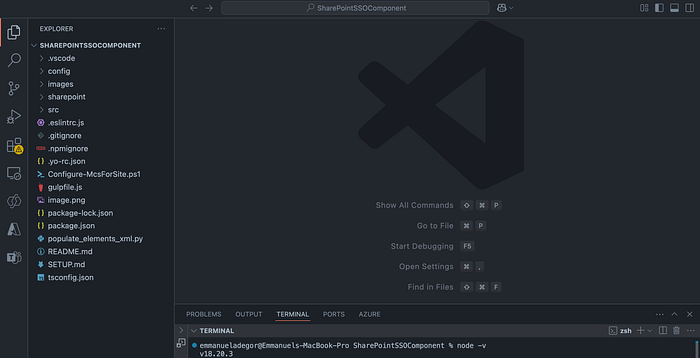
In this repo, you will find the SharePointSSOComponent project, which is a code sample for a SharePoint SPFx component (an Application Customizer), which renders a copilot at the bottom of all pages on a specific site. This SPFx component uses the MSAL library to perform a silent login and shares the user’s token with Microsoft Copilot Studio, providing a seamless single sign-on experience.
3. Using Visual Studio Code, open the local folder to which you have cloned the repository. The folder structure should look like below:
4. Manually replace placeholders in elements.xml with actual values. ClientSideComponentProperties accepts an escaped JSON string.
<?xml version="1.0" encoding="utf-8"?>
<Elements xmlns="http://schemas.microsoft.com/sharepoint/">
<CustomAction
Title="PvaSso"
Location="ClientSideExtension.ApplicationCustomizer"
ClientSideComponentId="bbcf8287-ea2d-4bb6-868f-19b9cf4b0812"
ClientSideComponentProperties="{"botURL":"YOUR_BOT_URL","customScope":"YOUR_CUSTOM_SCOPE","clientID":"YOU_CLIENT_ID","authority":"YOUR_AAD_LOGIN_URL","greet":true,"buttonLabel":"CHAT_BUTTON_LABEL","botName":"BOT_NAME"}">
</CustomAction>
</Elements>Replace these properties:
Mandatory:
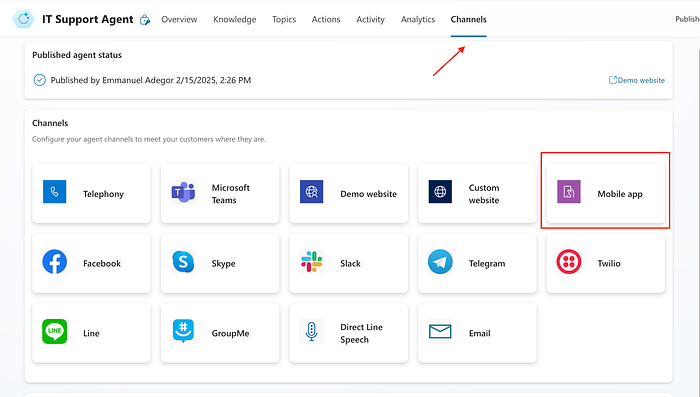
- botURL: The token endpoint for MCS. This can be found in the MCS designer, under Channels -> Mobile App.
- customScope: The scope defined for the custom API in the copilot app registration configured in part 1. (api://xxxxxxxx).
- clientID: The Application ID from the Canvas app registration configured in this article (part 2).
- authority: The login URL for your tenant. For example: https://login.microsoftonline.com/mytenant.onmicrosoft.com.
Optional:
- greet: Should the copilot greet users at the beginning of the conversation.
- buttonLabel: The label for the button opening the chat dialog.
- botName: The title for the copilot dialog.
5. After populating properties in elements.xml, open a new terminal in VS Code and navigate to the solution folder (the SharePointSSOComponent folder). Run the following commands:
npm install
gulp build
gulp bundle --ship
gulp package-solution --ship
6. Upload the app to your SharePoint app store, then add it to the SharePoint site(s) where you need to show this agent.
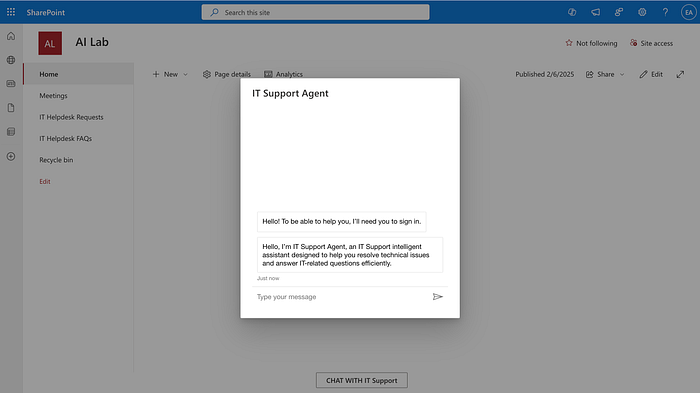
7. As an admin, you’ll be asked to consent on behalf of your organization/users, when you first click on the button, however, users can now utilize the Agent on a SharePoint site, without Signing in.
I’m sure you’ve noticed the custom “Was this response helpful?” feedback adaptive card that appears alongside responses. In my next blog post, I’ll provide a detailed technical guide on how to implement it. 😀